Last Updated on February 17, 2024 by KnownSense
Docker is a platform designed to help developers build, share, and run container applications. It is a set of platform as a service products that use OS-level virtualization to deliver software in packages called containers. These containers package the software and all its dependencies, enabling it to run uniformly on any infrastructure. It helps in abstracting the application from the environment, ensuring consistency across various environments, such as development, testing, and production.
Docker Desktop

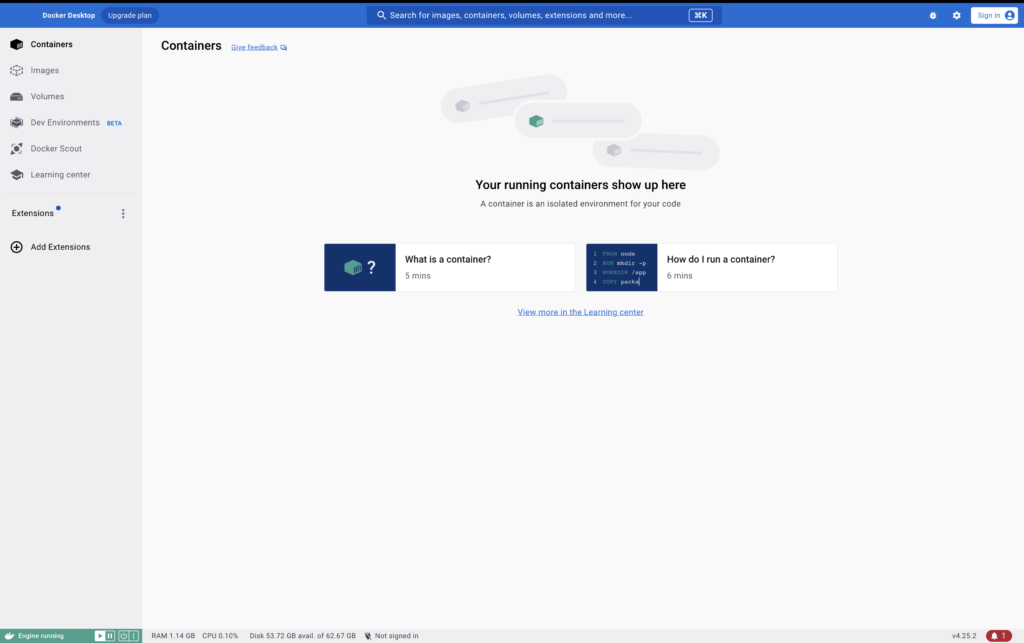
Docker Desktop is without doubt, the easiest and best way to get Docker on your laptop. It is slick as heck. It works on Windows and Mac and with a few easy clickety‑clucks of the old mouse, you’ll be in business.
Some quick prerequisite as things stand, if you rock and roll on Windows, you’re going to need a 64‑bit install of Windows 10 or later. As well as that, I recommend you have the WSL 2 back end installed and enabled. I know that’s going to be jargon for some of you. But I promise, it really sounds harder than it actually is. I mean, you basically just type install Docker Desktop on Windows into whatever your search engine or AI assistant, and chances are, you’re going to land at the official Docker page. And then you just take it from there.
However, if you rock and roll on Mac, you’re all good as long as you’re on macOS 11, 12, or 13, so Big Sur, Monterey, or Ventura. Oh, and of course, it works on Intel, as well as Apple Silicon. Same again, the easiest way is just to search Docker Desktop for Mac, and then it’s a walk in the park.
Installing Docker Desktop on Windows
- Download Docker Desktop: Go to the Docker Desktop download page for Windows.
- Run the Installer: Double-click the downloaded .exe file to start the installation process.
- Follow Installation Wizard: The wizard will guide you through the installation. Accept the license agreement and choose options if prompted.
- Enable Hyper-V and WSL 2 (Windows Subsystem for Linux):
- Enable Virtualization: Ensure that virtualization is enabled in your system BIOS settings. Docker Desktop requires this to run.
- Enable Hyper-V: Docker Desktop requires Hyper-V, which might need to be enabled on your Windows machine. You can do this by following these steps:
- Go to “Control Panel” > “Programs” > “Turn Windows features on or off.”
- Check the box for “Hyper-V” and click “OK.” This might require a system restart.
- Enable WSL 2: Docker Desktop uses WSL 2 backend on Windows for better performance. You can enable it by following these steps:
- Open PowerShell as an administrator and run
dism.exe /online /enable-feature /featurename:Microsoft-Windows-Subsystem-Linux /all /norestartdism.exe /online /enable-feature /featurename:VirtualMachinePlatform /all /norestart - Restart your system to complete the installation of WSL 2.
- Open PowerShell as an administrator and run
- Install WSL 2 Linux Kernel Update: Download and install the Linux kernel update package from Microsoft’s WSL 2 Linux kernel update page.
- Install Docker Desktop: Complete the installation of Docker Desktop as outlined earlier in steps 3-7 in the previous response.
- Launch Docker Desktop: Once installed, Docker Desktop should be available in your programs list. Launch it.
- Sign In (if required): If prompted, sign in with your Docker Hub account.
- Finish Installation: Follow the setup instructions to complete the installation.
Remember, administrative privileges are usually required during these steps. Once installed, open PowerShell or Command Prompt and type docker --version to check if Docker is installed and running properly on your Windows system.
Installing Docker Desktop on macOS
- Download Docker Desktop: Visit the Docker Desktop download page for macOS.
- Install Docker Desktop:
- Double-click the downloaded .dmg file to open the installer.
- Drag the Docker icon into the Applications folder.
- Launch Docker Desktop: Open Launchpad or go to Applications, find Docker, and open it.
- Login (if required): If prompted, log in with your Docker Hub credentials.
- Finish Installation: Follow the setup instructions to complete the installation.
- Verify Installation: After installation, open a terminal and type
docker --versionto confirm that Docker is installed and running properly.
For macOS, Docker Desktop doesn’t require additional features like WSL 2 on Windows, but it’s always a good idea to ensure your system meets Docker Desktop’s minimum requirements and that you have administrative privileges to install software.
Play with Docker
So we’ve looked at how to install Docker Desktop on a local machine, and it is the business. I love it. But what if you can’t install software on your computer? Maybe, like, you’ve only got access to a work machine that doesn’t let you install stuff. Or who knows, maybe your computer is too old or you’re worried about version conflicts or something. Honestly, no sweat. It’s all good. Play with Docker has got you covered. All you need is a modern browser and a Docker Hub account. So this is the URL labs.play-with-docker.

Oh yeah, there’s a cheeky little login. But all you need for this is a Docker Hub account, and they’re free. In fact, look. You know what? If you’re serious about learning Docker, a Hub account is pretty much mandatory. So, if you haven’t already got one, crack open a new tab, head over to hub.docker.com.
Conclusion
In this article you learned to set up Docker for creating, sharing, and running containerized apps using Docker Desktop on Windows and macOS. In future articles, we will explore Docker’s architecture and more. If unable to install, “Play with Docker” offers browser-based experimentation. A Docker Hub account, essential for learning, is free to create. Stay tuned for more Docker insights!